Mission and Event Timers: Difference between revisions
imported>Mark Grant No edit summary |
imported>Mark Grant m (→Mission Timer) |
||
| Line 10: | Line 10: | ||
The Mission Timer requires both 28VC and 115V AC power, and a 10Hz signal from the central timing equipment in the spacecraft. It can operate by using an internal tuning fork as a reference if the timing signal is lost, in which case a small timing fork symbol will be displayed in addition to the time. Currently this is not implemented in Orbiter. | The Mission Timer requires both 28VC and 115V AC power, and a 10Hz signal from the central timing equipment in the spacecraft. It can operate by using an internal tuning fork as a reference if the timing signal is lost, in which case a small timing fork symbol will be displayed in addition to the time. Currently this is not implemented in Orbiter. | ||
The Mission Timer in the Lunar Module is automatically set to the correct value when it is extracted from the SIVB. In reality the crew probably had to set it manually to match the CSM timer, or based on timings from the ground, but in Orbiter you can't have one person looking at the CSM panel while another looks at the LEM panel to activate the timer. | |||
==Event Timer== | ==Event Timer== | ||
Revision as of 12:56, 27 October 2006
Both the Command Module and Lunar Module have mission and event timers on the control panel. The Mission Timer is used to show the elapsed time since liftoff, whereas the Event Timer can be used for counting up or down to or from mission events.
Mission Timer

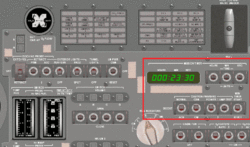
The Mission Timer can only count up, not down, from a minimum of 000:00:00 to a maximum of 999:59:59. The Mission Timer is automatically reset to zero at liftoff, and you can use the START/STOP/RESET switch on Panel 2 to start it running, stop it temporarily, or reset it to zero. In general, however, you will start it and leave it running forever after, unless you have a need to update the mission time displayed.
The time displayed can also be updated with the HOURS/MIN/SEC switches. The switches are spring-loaded to the center position, but clicking them down will increase the appropriate value (hours, minutes or seconds) by one, and clicking them up will increase it by ten. You can only increase the time, to reduce it you have to 'go around' back to zero and start again.
The Mission Timer requires both 28VC and 115V AC power, and a 10Hz signal from the central timing equipment in the spacecraft. It can operate by using an internal tuning fork as a reference if the timing signal is lost, in which case a small timing fork symbol will be displayed in addition to the time. Currently this is not implemented in Orbiter.
The Mission Timer in the Lunar Module is automatically set to the correct value when it is extracted from the SIVB. In reality the crew probably had to set it manually to match the CSM timer, or based on timings from the ground, but in Orbiter you can't have one person looking at the CSM panel while another looks at the LEM panel to activate the timer.
Event Timer


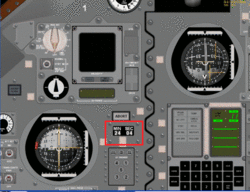
Unlike the Mission Timer, the Event Timer can count down as well as up. As with the Mission Timer it is reset to zero and starts counting up at launch, and it will also reset to zero in the event of an abort, to count time since the abort.
Another difference from the Mission Timer is that rather than an illuminated LED display, the Event Timer uses a more traditional design where the numbers are printed on rotating drums which turn over time. The readout can display any time from 00:00 to 59:59.
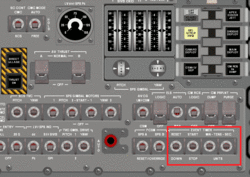
The MIN/SEC switches for the Event Timer operate in a similar manner to those for the Mission Timer, allowing you to change the displayed time. However, when the RESET/UP/DOWN switch is set to DOWN, the MIN/SEC switches will reduce the time displayed rather than increase it.