LM landing checklist (Quickstart)
Thanks to our great 3D graphic artists Project Apollo - NASSP and especially the NASSP Enhancement Pack provides beautiful meshes of the Apollo moon landing sites.

But as you are probably aware, landing on surface meshes is problematic in Orbiter. Orbiter uses surface mesh "collision detection" related to the UNDERSHADOWS feature and it is for the Tranquillity base landing site. Unfortunately, this is not working for bigger or more complicated meshes or landing sites consisting of more, overlapping meshes.
But thanks to Artlav there's the Meshland plugin, which provides collision detection with surface base meshes. The latest Project Apollo - NASSP beta release now supports Meshland, so we can land and walk on the lunar landing sites almost as the real astronauts did.
Landing the LM
Landing on a relatively flat landing site like Tranquillity is not very interesting. In order to provide a hilly landing site the "Meshland Pack" installs the Apollo 14 landing site, Fra Mauro. We start at the final appoach phase of the LM, also called "high gate".
- Start the "Apollo 14 - LM final approach" scenario in the "Project Apollo - NASSP\Quickstart Missions\Apollo 14" folder.
- The LM is controlled by LazyD's excellent landing autopilot simulating the LM guidance and control system very much like the real thing. Once started, the autopilot will automatically land the LM with no further user input. But, of course, we also want to land on different positions to test Meshland, on top of hills or the edges of craters, so we'll use the "landing point (re)designation" feature of the LM.
- After start of the scenario you look at the LM main panel. After a few seconds the appoarch phase starts, you'll notice a "LPD time=XX LPD angle=XX" message at the bottom of the screen. The DSKY changes from program P63 to program P64 and displays:
Noun 64
R1 = LPD time (seconds) LPD angle (degrees) SS DD
R2 = Altitude rate
R3 = Altitude

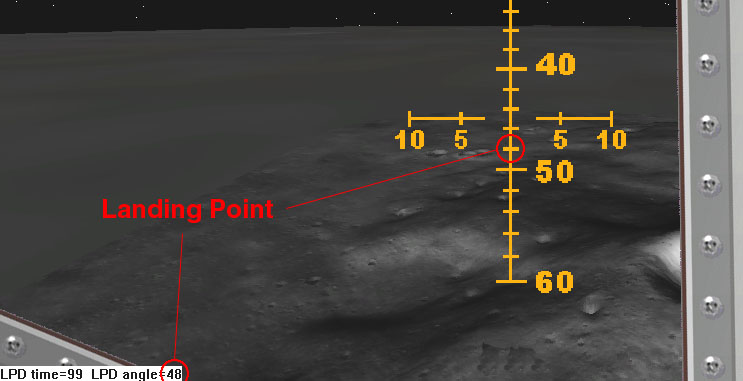
- Press <CTRL><LEFT> and <CTRL><DOWN> to switch to the LPD panel. This panel is still under development and quite empty at the moment, but you can use it to change the landing point in a very comfortable way. The LPD angle is the "down-angle" to the landing site, which matches the scribe marks on the LPD panel window. You can move the landing point closer, further, left or right with the following keys for target redesignation:
<COMMA> = left 2 degrees
<PERIOD> = right 2 degrees
<HOME> = 1/2 degree further
<END> = 1/2 degree closer
At the beginning of Approach phase, each key hit moves the target about 160 meters. As the LM gets closer to the target, the redesignations move the target smaller distances.
- Left/right redesignations will cause the LM to roll, which is necessary to change the direction of flight, and also to yaw in the direction of redesignation to keep the reticle on the target site at the LPD angle. It will take a few seconds for the yaw and roll to occur, so wait until the attitude settles down to make further adjustments. It works best if one estimates needed corrections for both left/right and near/far, enters them all at once, then wait until attitude settles to make finer adjustments. If you have a site targeted correctly, points on the surface closer than the site will appear to move toward bigger LPD numbers, while points beyond the site will appear to move toward smaller LPD numbers. The targeted site will stay at the displayed LPD number and centered on the vertical reticle.
- At any time during approach phase, one can assume manual control and enter P66 using either the <MINUS> or <EQUALS> key.
- When the approach phase is complete, P65 will take over and the DSKY display will change to:
Noun 60:
R1 = Forward velocity
R2 = Altitude rate
R3 = Altitude
- At any time during landing phase, one can assume manual control and enter P66 using either the <MINUS> or <EQUALS> key.
- P66 allows one to control the attitude of the LM using the numpad <2>, <4>, <6>, and <8> keys in the same manner as for RCS attitude control. Attitude will change only while a key is held down, and after key release attitude will remain constant until further control input. Rate of descent is controller using the <MINUS> or <EQUALS> keys. The first <MINUS> or <EQUALS> hit used to enter P66 does not increment or decrement the descent rate, but sets the current descent rate as default. Each <MINUS> or <EQUALS> key hit will increase/decrease the descent rate by 0.3077 m/s. P66 displays:
Noun 60:
R1 = forward velocity *10 (m/s)
R2 = rate of descent *10 (m/s)
R3 = altitude (m)
- At contact, the engine will shut down automatically and P68 will be run and tell you your landing latitude and longitude. The LM should sit properly on the landing site mesh, although tilting of the LM is not supported by the current Meshland version.
Walking on the moon
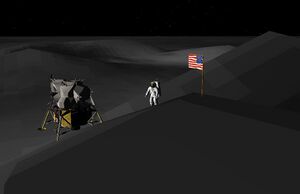
After landing the LM on the Fra Mauro landing site we want to do a little bit of mountain climbing on the moon.
- We are using a "Quickstart" realism mode scenario, so you can simply press <E> to start the lunar EVA.
- Once the focus changes to the astronaut, use the Numpad keys to move and turn the astronaut. Use time acceleration to reach the more distant parts of the landing site.

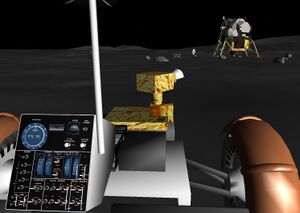
- If you like you can press <V> to spawn an LRV, the lunar rover. Of course the historical Apollo 14 mission didn't have a rover, but we are still in the "Quickstart" realism mode. Use the following keys to control the rover:
| Key | Usage |
|---|---|
| <NUMPAD> + | Accelerate forward (stops when velocity is zero) |
| <NUMPAD> - | Accelerate backward (stops when velocity is zero) |
| <NUMPAD> 1 | Turn left |
| <NUMPAD> 3 | Turn right |
| <NUMPAD> 5 or <NUMPAD> 2 | Center the steering |
- Hold <CTRL> while steering or accelerating for finer control (works well for 10x time acceleration).
- Press <F> to plant the flag nearby the astronaut, for example on the top of a hill.
- If you want to end the EVA, move the astronaut near or below the LM and press <E> (while the astronaut still has the focus, not the LM). The astronaut will vanish and you are back in the LM.